What a beautiful kit! I just found out there are refills for this kit and they are just $10, here is the number for ordering, #158469.
In addition to the material in the kit I used:
• I used a Basic White Cardstock bases and cut 8 ½“ by 5 ½”, Scored and folded at 4 ¼”
• A few pieces of Expressions in Ink DSP
• Bumblebee, Evening Evergreen, Vellum, Shimmer Vellum and Fresh Freesia Cardstock
• 2021-2023 In Color Jewels
I promised one of these cards to the next six people that put an order on my site and I will be notifying those people and getting those cards in the mail shortly.
I had always wanted to give this one a try. I can’t believe how easy it was to do! Basically 4 pieces of paper and a bit of folding. Who thought this up??? This was fun because it was a request from one of you, my subscribers. That made it special for me.
I had questions on this one:
Portrait is the orientation you see in the picture below, where the finished card is 4 1/4″ wide and 5 1/2″ long and the card opens like a book. This is the typical presentation.
Landscape is where the finished card is 5 1/2″ wide and 4 1/4″ long and the card opens either like a book or from bottom to top
Following are the Measurements and Supplies for today’s Fun Fold the Never Ending Card
I used a Basic Black Cardstock base and cut 2 pieces 4 ¼” by 5 ½”
Piece #1 is scored on the 4 ¼” side at 1 1/16” on both sides, then cut in half at 2 ¾” on the 5 ½” side.
Piece #2 is scored on the 5 ½” side at 1 3/8” on both sides then cut in half at 2 1/8” on the 4 ¼” side .
The DSP is from the Simply Elegant 12” by 12”Specialty Designer Series Paper.
DSP Page 1, 2 pieces 2 5/8” by 2” and 4 pieces 2” by 1 ¼”
DSP Page 2, 1 piece of DSP cut at 2” by 2 5/8” and a piece of basic white cut 2” by 2 5/8”
DSP Page 3, 2 pieces 2” by 2 5/8” and 4 pieces 7/8” by 1 ¼”
DSP Page 4, 2 pieces 2’ by 2 5/8”and 4 pieces 7/8” by 2 5/8”
Thanks for stopping by, let me know if you have questions. I hope you give this a try
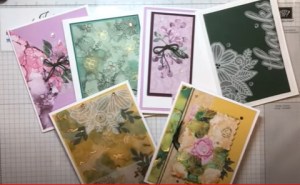
Fun, Fun, Fun, I love messing around with Patterned Paper! I haven’t done much with this stamp set and papers and this was a blast. We have so many choices with the patterned paper we have available to us. Now these Pansies were created with stamps and ink, but remember we have that beautiful paper we can use with the dies to just cut some out. I hope you give these a try.
Following are the Measurements and Supplies for today’s Expressions in Ink Pocket Birthday Card.
• I used Thick Basic White Cardstock for all the card bases and cut them 8 ½” by 5 ½”, scored and folded at 4 ¼” or 11” by 4 ¼” scored and folded at 5 ½”
• All DSP and or color cardstock was cut at 3” by 5 ¼”
• The DSP is from the Pansy Petals DSP or the 2021 – 2023 6” X 6” Incolor DSP Assortment
Thanks so much for stopping by, let me know if you have questions.
This is the June 2021, Ingenuity Inkers Blog Hop, using the Hand Penned Suite! Be sure to scroll to the bottom of the post to “hop” to the next Demonstrator to see what others have done with the suite.
This card was Such a blast to put together. I just love this Hand Penned Suite and the paper is just wonderful. I can’t seem to put away this Purple, Yellow and Green combination. I can hardly wait to see what the rest of my team creates with this amazing material.
You all seemed to really enjoy a little DSP on the back of the card, so I wrapped the DSP all the way around this card and into the inside. The inside piece then becomes part of the decoration on the inside of the card, what fun! I added a little Highland Heather Grosgrain Ribbon on both the inside and the outside of the card and added my sentiments. There is a video on this one on my YouTube Channel.
Measurements for todays Card:
I used a Thick Basic White Base 8 1/2″ by 5 1/2″ scored and folded at 4 1/4″
I also used a small scrap of So saffron to back the sentiment
Next I used a Highland Heather layering piece on the front 5 1/4″ by 4 1/8″ and placed it flush to the scored side of the card. You will also need a small scrap for the sintiment
The Hand Penned DSP is 5″ by 9 1/4″ to wrap all the way around the card
Thanks so much for stopping by. Let me know if you have questions.
Now click on the links below to “HOP” to the next Demonstrator on my team and see what they did with this suite!
This was one of the cards from my recent card SWAP video. I had a specific request to show how to make this card. One of my customers wrote back to me showing one she did with the simply elegant paper with black designs on each of the wings, stunning.
If you want to make this one as a standard size here are the measurements:
Thick Basic White Base 8 1/2″ by 5 1/2″, the tick mark on the bottom for the center of the card is at 2 3/4″. The tick mark on either side of this landscape card is 2 1/8″. The layering pieces are 4″ by 5 1/4″ and 3 3/4″ by 5″, otherwise the directions are the same.
Following are the Measurements and Supplies for today’s 5” by 7” Arrow Fold Congratulations Card.
I used Thick Basic White Cardstock for the card base 10” by 7”, scored and folded at 5”
Further Scored from the top corner of the card to the bottom center 3 ½” inch
and a second score from the center of either side of the card, 2 ½” to the bottom center of the card 3 ½”
Next Shimmery Vellum in Soft Succulent was 6 ½” by 4 ¾”
Then a piece of Hand Penned Designer Series Paper 5 ¾” by 4 ¼”
Such a pretty card and different without a ton of effort. Thanks for stopping by.
Don’t you just love SWAPS, I know I do. They can provide so much inspiration and I know a lot of inspirational demonstrators. The cards from my customer are precious. I have requests to show how to make a couple of these cards, and I will do in future videos.
SWAPS are from the following Demonstrators ** indicates on my team *** in my downline.
**Noreen Brungardt, Aurora Colorado – Joy of Cards – YouTube Channel and Blog
**Leonie Castro, Panorama City, California
***Toni Deaton, Lupton, Michigan – Come Craft With Me Toni D
**Pam Cullen, Augusta Maine – Three Mile Pond Girl Blog
**Wanda Johnson, Moulton, Alabama
**Carolyn Lubitski, Fort Myers, Florida – Stampin Crafty with Carolyn Blog and YouTube Channel
**Lori Lugauer, Chandler, Arizona
Terry Kaspari, Arvada, CO
Wanda Williams, Gastonia, North Carolina – I am on Wanda’s Team
**MJ Owens, , Los Lunas, New Mexico – Southwest Stamper
**Lori Lugauer, Chandler Arizona
**Pam Cullen, Three Mile Pond Girl, Augusta, Main – Blog
My name is Linda Bedinger and welcome to Ink and Ingenuity. I'm excited to share my love of Stampin' Up! with you!
Current Catalogs
2019 Beginner’s Catalog
Achievements
Archives
Categories
Disclaimer
The content in this blog is the sole responsibility of Linda Bedinger as a Stampin’ Up!® Independent Demonstrator. The use of and content of classes, services or products offered is not endorsed by Stampin’ Up!

 Cardstock")
 Specialty Designer Series Paper")


 Specialty Designer Series Paper")


 Designer Series Paper")
 Designer Series Paper")
 Open Weave Ribbon")
 Open Weave Ribbon")
 Open Weave Ribbon")


 Designer Series Paper")


 Grosgrain Ribbon")
")


